How to Paint Kitchen Cabinets
Many old homes have a recurring issue with a claustrophobic kitchen. Dark wood paneling on the cabinets combined with a ’70s paint job makes the whole room feel enclosed, dark and stuffy. Sometimes even a nice window refuses to let in enough light to brighten up the place. In these cases, it is amazing what a little paint can do. Coat your cabinets with a light colored paint and suddenly the space feels much more open and airy.

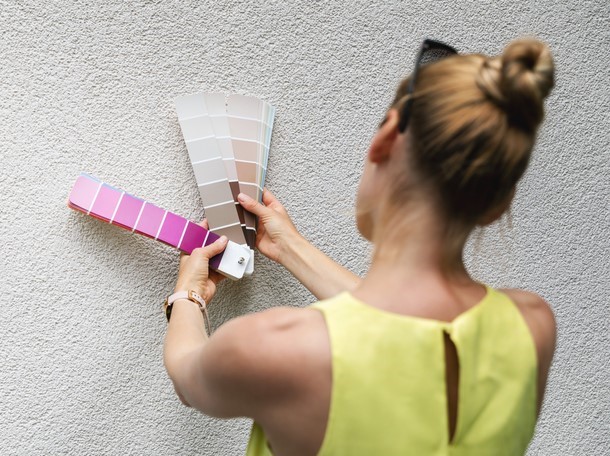
Step 1: Make Decisions
You probably won’t be able to take one look at your cabinets and decide what paint color you want. Do you go for a pastel shade of blue or green? Is a yellow shade more appropriate for the rest of your decor? Bring home a set of sample paint swatches and picture what the room will look like primarily in that color. If you have talent with a computer graphics program, you can even attempt to simulate it.
Once you have decided on your color, you can also decide on your hardware. Do you want to keep the old drawer handles and hinges, or will you update to a more modern set? Be aware that new hardware might not be able to use the same holes as the current hardware, so you may need to adapt to different spacing.
Step 2: Prepare
Buy your paint. Buy your hardware. Buy your paint supplies, including any brushes and small rollers you want. A pair of small rollers and a pair of angle-tipped brushes should be plenty. Pick up a drop cloth to paint on. They only cost a couple of dollars and they serve quite well for this and other house painting projects. For kitchen cabinets, you will probably want a latex paint with a semi-gloss finish. This makes a nice resistant surface for later cleaning. You can always bring a detached door to the hardware store and ask the people who work there what kind of paint they recommend.
Once you have all of your supplies, remove all of the hardware from your cabinets. This includes the hinges, so you will be removing the doors as you go. Store all of the hinges and handles in a single bag so you never lose a piece. Once all the doors are loose and the cabinet frames exposed, it’s time to clean. In all likelihood, years of grease and grime have built up on these wooden surfaces. Take some grease-cutting soap and scrub them clean.

Step 3: Preparing the Surface
If you chose to go with new hardware, you may have discovered that it doesn’t quite fit in the old holes. You will need a tube of wood filler from your local hardware store to patch the old holes. When you’re painting cabinets like this, you won’t need to worry about matching the shade of the wood too closely. This is also the time to patch any annoying gouges and dings on the cabinets themselves. This way you’ll have a nice smooth surface once the paint is applied.
Examine the surface of your cabinets. Is it shiny? Chances are it is covered with layers of protective polyurethane. If you need help deciding whether to sand, feel the surface. Is it matte and slightly absorbent like a good cutting board? It’s probably fine without sanding. Does it feel more like a piece of plastic? Chances are you should sand it. If they are already painted, see if you can determine how old the paint is. Old paint might contain lead, and it’s best to remove it before you paint over it. Be careful! Lead paint is a health hazard, and sanding will get particles of it everywhere.

Step 4: Prime Everything
Even though you have already cleaned and sanded your cabinets, there still may be years-old grease stains deep in the wood. Don’t worry about sanding them out. Primer paint is designed specifically to hide these kinds of things. You will probably want to go for an oil-based primer, because grease stains have been known to seep through water-based paints and show on the new surface. One coat of oil-based primer should work perfectly for your cabinets.
Using a small paint roller, apply primer to the cabinets. You can use a small brush to work the paint into smaller grooves and patterns that the roller won’t reach. One coat should be plenty. Your primer is only there to cover the majority of any color, pattern and stain underneath. It serves to prime the surface for the actual paint later on. Once you have applied the primer, go ahead and let it dry for a couple of hours. Don’t worry about cleaning out the roller and brush — oil-based primer is hard to clean. Save the tools for any later house painting projects you may have.
Step 5: Painting
The primer should be tacky but dry by now. You can do the majority of your painting with a small roller, using your brush sparingly. This helps minimize the texture difference caused by brushstrokes and helps you paint more quickly. You will want to wait for the first coat to dry before applying the second coat. It is entirely possible, if you started early, to finish priming and painting cabinets in the space of a day.
The process of painting is where all the fun is. You get to see your chosen color displayed for the world on your cabinets and drawers. Use a steady hand to roll on paint in even strokes. Your roller is perfect for most of the cabinets and doors. It will let you easily cover the flat surfaces. For smaller crevices and grooves in the wood, use a small brush with an angled tip. The angle will help you work paint into the small grooves and corners without leaving large drops pooling in small recesses.
Did you plan to paint the inside of the cabinet doors? If so, do the inside first. You should let the primer and paint dry for several days before flipping them over to paint the outside. You do the inside first so that if anything goes wrong when you flip it, the mistakes are mostly hidden. You wait several days so the paint has had time to solidify and can resist damage.
Step 6: Finishing Up
Paintway advise you to wait for at least three days before hanging your doors once more. This gives the paint plenty of time to dry and harden. Five days is best for the most safety.
If you’re using old hardware, simply reattach it where it was before and replace everything. If you’re using new hardware, you will need to drill fresh pilot holes for the new screws. Make sure you follow the old construction adage. Measure twice, cut — or drill — once. Even taking your time, this will only take an hour or so. Finally, with your freshly painted doors hung once more, you can enjoy your new kitchen
")